A Lengthy Project Update
Whew! I banged the last section of flooring into the dining room yesterday at 4:10 pm. This floor has been a challenge in ingenuity and a major hassel. I'm so glad it is, for the most part, done. Now I can move on to more less stressful tasks-namely painting the paneling over. Right now all I have is a coat of primer on them.
I screwed up. Laminate flooring is essentially a no-brainer to install. But what had happened was one of those "only to me" type situations.
See, a couple years back I had got the brilliant idea to re-do the front room AND dining room while the younguns were off at summer church camp. I measured and re-measured the dimensions of each room and worked up an estimate of how many sq. ft. of flooring I would need, did some comparison shopping and settled on a store about 40 miles away who had the best price I could find for laminate flooring. Flush with a tidy tax refund I went there and bought umpteen boxes of the stuff-enough to do the front room and dining room, with a box or 2 extra for the inevitable screw-ups. The weight of all those boxes made my Taurus wagon sag a couple inches lower to the road and caused it to literally waddled down the hiway.
It took me a week of almost non-stop activity to get the front room done. It was then that the problem had started.
See, unlike most men, I as a female, will actually read the directions. The detailed directions for the flooring were read and re-read until I felt I had a full and complete understanding of the process. Seemed simple enough. Start your line along one wall, the laminate sections all facing a certain way and then commence to gently tap in the next row, staggering your panels as you go. OK, I got that.
2 days later, I had only a strip about 4 feet into the room and running about 20 feet in length. My hands were blistered and bloodied from swinging the hammer and block of wood to "gently" tap the panels into place and my entire body was stiff and sore from being bent over in the same posistion all day long. The process was going obscenely slow and I was ruining whole panels at an alarming rate. Some thing was horribly wrong here. I read the directions and scrutinized the illustrations again. I was following them to a T. WTF????!!! The guy at the store had said that a room that size should only take an afternoon to complete, here it had been 2 days-10 hours at a whack. I was flummoxed. I was exhausted. I was in tears.
The answer literally came to me in a dream. It was also the only time that I had seen my husband in a dream since his passing in which he actually spoke. Up until then it had been only fleeting images and always silent. Now in my greatist moment of need, he appeared and gave me some cryptic advice.
I saw him in the front room, in his usual work duds-baggy jeans, tye-dye shirt, those silly carpenter suspenders that look like yellow tape measurer tape to which were attached his tool belt. His old blue bandanna was tied around his head, flat carpenter's pencil stuck behind an ear and he was measuring a corner. He stood and snapped the steel tape back into the case and said, as clear as day:
"Hell, honey-Ya oughta know everything in this house is done assbackwards!"
My eyes flew open and I sat up in bed, it was just starting to get light outside. THAT'S IT!!!!! Eureka!
I sprang to the front room, still in my 'jammies and began to yank up the floor.
The directions had been WRONG! It had said to start your row with the grooved edge to the wall. These were the old style tongue and groove type connections that required tapping the next panel into place. By going by the instructions, I had been ruining the 'tongue' part of the panel when I banged the connecting panel into place. It took alot of finese to do it as they instructed and was for the most part worthless, wasteful and ineffective. The force of the tapping would be better tolerated by the groove face...not the tongue side.
I reversed the starting panels and by noon the room was DONE! And no more panels ruined.
But the ordeal had left me wore out and burnt. The dining room would have to wait. I rested on the laurels of my achievement of conquering the front room. I still had plenty of laminate left to do the dining room when the time came.
I thought.
That project sat on the back burner until just recently and now I had a whole NEW problem on my hands.
See, even though I had saved all the scraps from the frontroom project, the actual number of USABLE panels had been reduced. Something I hadn't calculated when I began the dining room. 3/4ths of the way in I realized Oh Crap! I don't have enough to finish!
No problem-I just get another box or 2 in a similar finish (honey oak).
HA!!
A funny thing had happened during the time I did the front room and now-the entire standard for laminate flooring had changed!!
ALL manufacturers had gone over to a snap in style of connection. The original tongue and groove type was now obsolete and no longer available. Believe me, I tried to hunt it down. Spent an entire day trying to locate it locally. It ain't out there any more. Gone, zippo, a ghost. Once again, I was screwed. Cuz there is no way in hell one can 'retrofit' the new panels to old. Won't work. Totally different system.
I did some calculations on just how much I would need and how much I actually had on hand, I even included the scraps and ruined panels in this because I knew someway I would have to use them to make this work. I was short by about 25 sq. ft....the amount about one box would do. Crap. So close and so far away.
I took a few days off to cogitate upon this dilemma. What to do? How can I do this and not have it look too stupid, too halfass, too...well...goofy and like I didn't know what I was doing.
I'd have to fake it. Make my screw-up look like it was intentional, part of the design.
My solution? Set aside an area just in front of the kitchen entryway, roughly about 4 x 5 feet to be tiled. I had done something similar at the front door, but that was intentional. This tiled area would be directly catty corner to the front door entryway, so the hillbilly feng shui of it all just might work!
But even though that had bought me some footage, I still had the problem of how to use the scraps which I would need to do. Another novel solution! I would be changing the arrangement of the room, moving the huge corner china hutch to an opposite corner. It was there I would cobble in the scraps-in that corner. The hutch would hide all that! Huzzah! Man, I'm good.
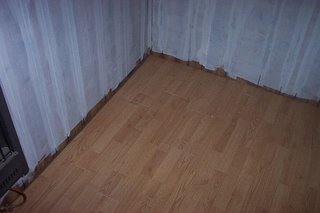
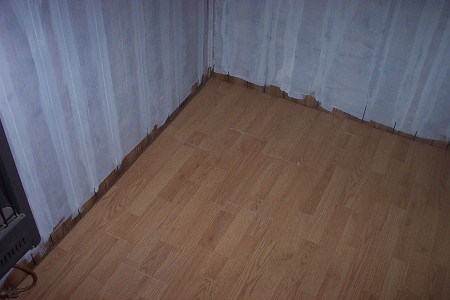
So that's what I did. And everything fit so nicely you can't even tell! Well, I can. There are a few spots where I didn't get a perfect straight cut and there are a couple of ill fitting spaces, but that was easily fixed with some wood putty. Just at a glance, one can't really tell. And like I said, it'll be mostly hidden by the corner hutch. Just for the hell of it-here's a pic of the corner. If you really look you can see the lighter lines of the putty fill.
I screwed up. Laminate flooring is essentially a no-brainer to install. But what had happened was one of those "only to me" type situations.
See, a couple years back I had got the brilliant idea to re-do the front room AND dining room while the younguns were off at summer church camp. I measured and re-measured the dimensions of each room and worked up an estimate of how many sq. ft. of flooring I would need, did some comparison shopping and settled on a store about 40 miles away who had the best price I could find for laminate flooring. Flush with a tidy tax refund I went there and bought umpteen boxes of the stuff-enough to do the front room and dining room, with a box or 2 extra for the inevitable screw-ups. The weight of all those boxes made my Taurus wagon sag a couple inches lower to the road and caused it to literally waddled down the hiway.
It took me a week of almost non-stop activity to get the front room done. It was then that the problem had started.
See, unlike most men, I as a female, will actually read the directions. The detailed directions for the flooring were read and re-read until I felt I had a full and complete understanding of the process. Seemed simple enough. Start your line along one wall, the laminate sections all facing a certain way and then commence to gently tap in the next row, staggering your panels as you go. OK, I got that.
2 days later, I had only a strip about 4 feet into the room and running about 20 feet in length. My hands were blistered and bloodied from swinging the hammer and block of wood to "gently" tap the panels into place and my entire body was stiff and sore from being bent over in the same posistion all day long. The process was going obscenely slow and I was ruining whole panels at an alarming rate. Some thing was horribly wrong here. I read the directions and scrutinized the illustrations again. I was following them to a T. WTF????!!! The guy at the store had said that a room that size should only take an afternoon to complete, here it had been 2 days-10 hours at a whack. I was flummoxed. I was exhausted. I was in tears.
The answer literally came to me in a dream. It was also the only time that I had seen my husband in a dream since his passing in which he actually spoke. Up until then it had been only fleeting images and always silent. Now in my greatist moment of need, he appeared and gave me some cryptic advice.
I saw him in the front room, in his usual work duds-baggy jeans, tye-dye shirt, those silly carpenter suspenders that look like yellow tape measurer tape to which were attached his tool belt. His old blue bandanna was tied around his head, flat carpenter's pencil stuck behind an ear and he was measuring a corner. He stood and snapped the steel tape back into the case and said, as clear as day:
"Hell, honey-Ya oughta know everything in this house is done assbackwards!"
My eyes flew open and I sat up in bed, it was just starting to get light outside. THAT'S IT!!!!! Eureka!
I sprang to the front room, still in my 'jammies and began to yank up the floor.
The directions had been WRONG! It had said to start your row with the grooved edge to the wall. These were the old style tongue and groove type connections that required tapping the next panel into place. By going by the instructions, I had been ruining the 'tongue' part of the panel when I banged the connecting panel into place. It took alot of finese to do it as they instructed and was for the most part worthless, wasteful and ineffective. The force of the tapping would be better tolerated by the groove face...not the tongue side.
I reversed the starting panels and by noon the room was DONE! And no more panels ruined.
But the ordeal had left me wore out and burnt. The dining room would have to wait. I rested on the laurels of my achievement of conquering the front room. I still had plenty of laminate left to do the dining room when the time came.
I thought.
That project sat on the back burner until just recently and now I had a whole NEW problem on my hands.
See, even though I had saved all the scraps from the frontroom project, the actual number of USABLE panels had been reduced. Something I hadn't calculated when I began the dining room. 3/4ths of the way in I realized Oh Crap! I don't have enough to finish!
No problem-I just get another box or 2 in a similar finish (honey oak).
HA!!
A funny thing had happened during the time I did the front room and now-the entire standard for laminate flooring had changed!!
ALL manufacturers had gone over to a snap in style of connection. The original tongue and groove type was now obsolete and no longer available. Believe me, I tried to hunt it down. Spent an entire day trying to locate it locally. It ain't out there any more. Gone, zippo, a ghost. Once again, I was screwed. Cuz there is no way in hell one can 'retrofit' the new panels to old. Won't work. Totally different system.
I did some calculations on just how much I would need and how much I actually had on hand, I even included the scraps and ruined panels in this because I knew someway I would have to use them to make this work. I was short by about 25 sq. ft....the amount about one box would do. Crap. So close and so far away.
I took a few days off to cogitate upon this dilemma. What to do? How can I do this and not have it look too stupid, too halfass, too...well...goofy and like I didn't know what I was doing.
I'd have to fake it. Make my screw-up look like it was intentional, part of the design.
My solution? Set aside an area just in front of the kitchen entryway, roughly about 4 x 5 feet to be tiled. I had done something similar at the front door, but that was intentional. This tiled area would be directly catty corner to the front door entryway, so the hillbilly feng shui of it all just might work!
But even though that had bought me some footage, I still had the problem of how to use the scraps which I would need to do. Another novel solution! I would be changing the arrangement of the room, moving the huge corner china hutch to an opposite corner. It was there I would cobble in the scraps-in that corner. The hutch would hide all that! Huzzah! Man, I'm good.
So that's what I did. And everything fit so nicely you can't even tell! Well, I can. There are a few spots where I didn't get a perfect straight cut and there are a couple of ill fitting spaces, but that was easily fixed with some wood putty. Just at a glance, one can't really tell. And like I said, it'll be mostly hidden by the corner hutch. Just for the hell of it-here's a pic of the corner. If you really look you can see the lighter lines of the putty fill.
posted by white trash republican at Tuesday, May 02, 2006
![]()
![]()


10 Comments:
Gotta give y'all credit WTR. I know with me...if'n there's more than two movin parts...with me bein one of em...I usually have lots of troubles with the project...Good fer you....Cookie...
Good job. Now you understand why us guys don't bother with the instructions. Most of them get written in some other language and poorly translated anyway.
I remember one set of instrutions I got with some piece of equipment that had this line: "It is FORBIDDEN to leave this item in direct sunlight".
Well, that was what the devil of the thing was, Lem. The directions were in flawless American English, so I had no reason to suspect they might be wrong.
The company is/was based in Conn. but almost all laminate comes from Germany, so I reckon it was a Yank who did the translating from German to English and missed one vital word!
But if a thing comes from Korea or China, you can be sure there will be alot of amusing directions!
Thanks Cookie, If I could afford it I'd just have a whole battalion of guys come over and completely overhaul this dump, but I can't so most crap I gotta do on my own. It's been a learning experience! This place is like the Winchester House...it'll never be done!
We just finished putting laminate floor on the room that we created out of the back verandah about 600 sq ft but it was the new type - a snap. You did damn well. Nothing like hillbilly feng shui.
The new stuff IS easy! Bing, bang, cut for fit here, cut for fit there, tah-dah, you're done!
Guess I shoulda just waited to do my projects, but who knew the entire standard would change over so fast?
I'm just glad it's over! But I'm trying to fight back the urge to do the hallway now in the new laminate! But I probably will...eventually.
Ohhh...Patrick..."Hillbilly Feng Shui"...is that where the woodstove is in the North part of the parlor, the dog facin south of the back porch...and the "Still" in the lower forty....?
Ohhh...Patrick..."Hillbilly Feng Shui"...is that where the woodstove is in the North part of the parlor, the dog facin south of the back porch...and the "Still" in the lower forty....?
HaHaha! Why,yes it is, Cookie!
Thanks, I was trying to think of an example-but I couldn't have done better than that!
(and as for the double post...dunno how or why that happened! I'm afraid to delete one, cuz it might erase both!)
I am highly impressed! You're an inspiration.
Kathy, please!
This from the woman who homeschools her 3 boys AND keeps a milk cow amongst all the other stuff you do!
Post a Comment
<< Home